snap install powershell –classic
Run Powershell
#powershell
Connect to O365
Create file connect powershell
-------------------connect-exchangeonline.ps1-----------------------------
Set-ExecutionPolicy remotesigned
$UserCredential = (Get-Credential -Credential email@domain.com)
$Session = New-PSSession -ConfigurationName Microsoft.Exchange -ConnectionUri https://outlook.office365.com/powershell-liveid/ -Credential $UserCredential -Authentication Basic -AllowRedirection
Import-PSSession $Session -DisableNameChecking
#Remove-PSSession $session
Connect-MsolService -Credential $UserCredential
-------------------End--------------------------------------------------------------
#PS /home/hades/Downloads> ./connect-exchangeonline.ps1
PowerShell credential request
Enter your credentials.
Password for user email@domain.com: *********
Success
Test command
Check version
PS /home/hades/Downloads> $PSVersionTable
Name Value
---- -----
PSVersion 6.2.1
PSEdition Core
GitCommitId 6.2.1
OS Linux 4.15.0-54-generic #58-Ubuntu SMP Mon Jun 24 10:55:24 UTC 2019
Platform Unix
PSCompatibleVersions {1.0, 2.0, 3.0, 4.0…}
PSRemotingProtocolVersion 2.3
SerializationVersion 1.1.0.1
WSManStackVersion 3.0
MFA
Connect Exopssession: Connect-EXOPSSession -UserPrincipalName email@yourdomain.com
Close power shell connection:Get-PSSession
Get-PSSession | Remove-PSSession
Create new Distribution group
New-DistributionGroup -Name "Group-test01" -DisplayName "Group test by hades" -Type "Security"
Check distribution group information?
Get-DistributionGroup -Identity "distribution group"
Get-DistributionGroup -Identity "distribution group" | Format-List
Get-DistributionGroup "distribution group" | Format-Table
* Show member on group with name and email address
Get-DistributionGroupMember "distribution group" | Format-Table Name, PrimarySMTPAddress -Auto
Check list member email on Distribution group
Get-DistributionGroupMember -Identity "distribution group" | Format-Table Name, Alias, PrimarySMTPAddress -Auto
* Export email form distribute group
Get-DistributionGroupMember -Identity "distribution group" ` | Select-Object Displayname,Name,PrimarySMTPAddress ` | Export-CSV -Path "/home/User/Downloads/distribution group.csv" -Encoding UTF8
* Import email form distribute group
1. create new file .csv like Distibute group.csv and input data like this see below.
-----------------Distibute group.csv---------------
name,emailaddress
jack,jack@domain.com
mack,mack@domain.com
---------------------------------------------
2. run command
Import-Csv group.csv | foreach {Add-DistributionGroupMember -Identity "Distibute group" -Member $_.name}
Add member to distribution group
Add-DistributionGroupMember -Identity "distribution group" -Member "email@domain.com"
Remove distribution group and Member in group
Remove-DistributionGroupMember -Identity "distribution group"
Remove-DistributionGroupMember -Identity "distribution group" -Member "email@domain.com"
View all O365group list
Get-UnifiedGroup -Identity *
View member on O365 group list
Get-UnifiedGroup -Identity groupname | Get-UnifiedGroupLinks -LinkType Member | Format-Table Name, PrimarySMTPAddress
View member on O365 subscribers list ตรวจสอบกรณีคนในกลุ่ม O365 ไม่ได้รับเมล
Get-UnifiedGroupLinks -Identity groupname@domain.com -LinkType subscribers
ให้แอดเพิ่มเข้าไป ด้วยคำสั่งนี้
Add-UnifiedGroupLinks -Identity groupname@domain.com -LinkType subscribers -Links email1@domain.com
Unsubscribers member O365 group
Remove-UnifiedGroupLinks -Identity "groupname" -LinkType Members -Links abc.d@domain.com,abcde.f@domain.com
Export member on O365 group list
Get-UnifiedGroup -Identity groupname | Get-UnifiedGroupLinks -LinkType Member | select Name, PrimarySMTPAddress |Export-Csv C:\Users\user01\Documents\groupname.csv
Add Owner distribution group
-Check owner on distribution
Get-DistributionGroup -Anr "distribution name" | Format-Table Name, ManagedBY, Alias, Email -Auto
-Replace
Set-DistributionGroup "distribution group" -ManagedBy "email@domain.com" -BypassSecurityGroupManagerCheck
-Add more one email
Set-DistributionGroup "distribution group" -ManagedBy 'admin01','admin02','systemadmin' -BypassSecurityGroupManagerCheck
Get mailbox permission
Get-MailboxPermission "user1"
Add Full access mailbox permission : user2 full access user1
Add-MailboxPermission -Identity "user1" -User "user2" -AccessRights FullAccess -InheritanceType All
Remove Full access mailbox permission
Remove-MailboxPermission -Identity "user1" -User "user2" -AccessRights FullAccess -InheritanceType All
Get Last login:
Get-MailboxStatistics "user1"
Get Mailbox size:
Get-MailboxStatistics "user1" | ft DisplayName, TotalItemSize, ItemCount
Get All Mailbox
Get-Mailbox | Select-Object DisplayName, primarySMTPAddress
Get one mailbox
Get-Mailbox "user1" | Select-Object DisplayName, primarySMTPAddress
Display the list of a SMTP aliases and the primary address
Get-Mailbox "user1" | fl EmailAddresses, PrimarySmtpAddresses
Add Permission Calendar access mailbox
Add-MailboxFolderPermission -Identity "user1:\Calendar" -User "user2" -AccessRights Reviewer
Add permission Calendar access Default to Reviewer
Set-MailboxFolderPermission -Identity "user1:\Calendar" -User Default -AccessRights Reviewer
Set permission Calendar access Default (back)
Set-MailboxFolderPermission -Identity "user1:\Calendar" -User Default -AccessRights AvailabilityOnly
View permission calendar who access mailbox
Get-MailboxFolderPermission -Identity "user1:\Calendar"
foreach($i in Get-Mailbox -ResultSize 100 -Filter 'DisplayName -like "*ห้องประชุม*"') {Get-MailboxFolderPermission $($i.Alias + ":\Calendar")| Select-Object Identity,User,AccessRights | Sort-Object Identity}
* -ResultSize Unlimited
Delete user access pemission calendar
Remove-MailboxFolderPermission -Identity "user1:\Calendar" -User "user2"
View number of account license
Get-MsolAccountSku
Get all assigned License office O365
Get-MsolUser -All | Where-Object { ($_.licenses).AccountSkuId -match "nanyangtextilegroup:STANDARDPACK" } | Select-Object DisplayName,UserPrincipalName,Licenses,Department,Title,Country,State,WhenCreated | Export-Csv C:\Users\hades\Documents\allmaillicense2-1.csv
Get-MsolUser -MaxResults 10 | Where-Object { ($_.licenses).AccountSkuId -match "nanyangtextilegroup:STANDARDPACK" } | Select-Object DisplayName,UserPrincipalName,Licenses,Department,Title,Country,State,WhenCreated | Format-Table
Get-MsolUser -All | Where-Object { $_.isLicensed -eq "E1" } | Select-Object DisplayName,UserPrincipalName,Licenses,Department,Title,Country,State,WhenCreated | Export-Csv C:\Users\hades\Documents\allmaillicense2-1.csv
Get all Unlicense office O365
Get-MsolUser -UnlicensedUsersOnly | Select-Object DisplayName,UserPrincipalName,Licenses,Department,Title,Country,State | Export-Csv C:\Users\hades\Documents\unlicense.csv
Get all email user on Department "QA"
Get-MsolUser -MaxResults 1000 | where {$_.Department -eq "QA"} | Select-Object DisplayName,UserPrincipalName,Licenses,Department,Title,Country,State | Format-Table
Get all email user by Contry "Vietnam"
Get-MsolUser -MaxResults 1000 | where {$_.Country -eq "Vietnam"} | Select-Object DisplayName,UserPrincipalName,Licenses,Department,Title,Country,State | Format-Table
Get view detail email
Get-MsolUser -All | where {$_.DisplayName -eq "ABC DEFC"} | Select-Object DisplayName,UserPrincipalName,Department,Title,Country,State,WhenCreated | Format-Table
Display a list of users who haven’t changed their passwords for more than 90 days:
Get-MsolUser -MaxResults 20 | Where-Object { $_.LastPasswordChangeTimestamp -lt (Get-Date).AddDays(-90)} | Select-Object DisplayName,UserPrincipalName,LastPasswordChangeTimestamp,Licenses,PasswordNeverExpires | Format-Table
Change new password email with Powershell
Set-MsolUserPassword -UserPrincipalName user1@onmicrosoft.com -NewPassword P@SSw0rd!
Rebuild Index email O365
New-MoveRequest -Identity user1@domain.com
Check status rebuild Index
Get-MoveRequest -Identity user1@domain.com
Get mail Inbox Forwarding
Get-Mailbox -ResultSize 2000 | select UserPrincipalName,ForwardingSmtpAddress,DeliverToMailboxAndForward | Export-csv Office365Forwards.csv -NoTypeInformation
Get email Forwarding
Get-Mailbox email@domain.com | FL DeliverToMailboxAndForward,ForwardingAddress,ForwardingSmtpAddress
Create new external contact
New-MailContact -Name "My-gmail" -ExternalEmailAddress email@gmail.com
Display user not set Archive
Get-Mailbox -Filter {ArchiveStatus -Eq "None" -AND RecipientTypeDetails -eq "UserMailbox"}
Check for Archive status for some user
Search and Delete mail by Subject
2. Get-Mailbox -ResultSize unlimited | Search-Mailbox -SearchQuery 'Subject:"subject send mail"' -DeleteContent
Search-Mailbox "sourcmail" -TargetMailbox "targetmail" -TargetFolder "TargetFolder" -LogLevel Full

Check archive In-place size


Ref:
get-msoluser
office-365-powershell-commands
how-to-install-microsoft-powershell-on-ubuntu
forward email
search and delete mail
copy mailbox
MFA Function
Connect-MsolService
Close power shell connection:Get-PSSession
Get-PSSession | Remove-PSSession
New-DistributionGroup -Name "Group-test01" -DisplayName "Group test by hades" -Type "Security"
Check distribution group information?
Get-DistributionGroup -Identity "distribution group"
Get-DistributionGroup -Identity "distribution group" | Format-List
Get-DistributionGroup "distribution group" | Format-Table
* Set receive mail from out side
Get-DistributionGroup -Identity Group name | Set-DistributionGroup -RequireSenderAuthenticationEnabled $False
* Show member on group with name and email address
Get-DistributionGroupMember "distribution group" | Format-Table Name, PrimarySMTPAddress -Auto
Check list member email on Distribution group
Get-DistributionGroupMember -Identity "distribution group" | Format-Table Name, Alias, PrimarySMTPAddress -Auto
* Export email form distribute group
Get-DistributionGroupMember -Identity "distribution group" ` | Select-Object Displayname,Name,PrimarySMTPAddress ` | Export-CSV -Path "/home/User/Downloads/distribution group.csv" -Encoding UTF8
* Import email form distribute group
1. create new file .csv like Distibute group.csv and input data like this see below.
-----------------Distibute group.csv---------------
name,emailaddress
jack,jack@domain.com
mack,mack@domain.com
---------------------------------------------
2. run command
Import-Csv group.csv | foreach {Add-DistributionGroupMember -Identity "Distibute group" -Member $_.name}
Add member to distribution group
Add-DistributionGroupMember -Identity "distribution group" -Member "email@domain.com"
Remove distribution group and Member in group
Remove-DistributionGroupMember -Identity "distribution group"
Remove-DistributionGroupMember -Identity "distribution group" -Member "email@domain.com"
View all O365group list
Get-UnifiedGroup -Identity *
View member on O365 group list
Get-UnifiedGroup -Identity groupname | Get-UnifiedGroupLinks -LinkType Member | Format-Table Name, PrimarySMTPAddress
View member on O365 subscribers list ตรวจสอบกรณีคนในกลุ่ม O365 ไม่ได้รับเมล
Get-UnifiedGroupLinks -Identity groupname@domain.com -LinkType subscribers
ให้แอดเพิ่มเข้าไป ด้วยคำสั่งนี้
Add-UnifiedGroupLinks -Identity groupname@domain.com -LinkType subscribers -Links email1@domain.com
Unsubscribers member O365 group
Remove-UnifiedGroupLinks -Identity "groupname" -LinkType Members -Links abc.d@domain.com,abcde.f@domain.com
Export member on O365 group list
Get-UnifiedGroup -Identity groupname | Get-UnifiedGroupLinks -LinkType Member | select Name, PrimarySMTPAddress |Export-Csv C:\Users\user01\Documents\groupname.csv
Add Owner distribution group
-Check owner on distribution
Get-DistributionGroup -Anr "distribution name" | Format-Table Name, ManagedBY, Alias, Email -Auto
-Replace
Set-DistributionGroup "distribution group" -ManagedBy "email@domain.com" -BypassSecurityGroupManagerCheck
-Add more one email
Set-DistributionGroup "distribution group" -ManagedBy 'admin01','admin02','systemadmin' -BypassSecurityGroupManagerCheck
Get mailbox permission
Get-MailboxPermission "user1"
Add Full access mailbox permission : user2 full access user1
Add-MailboxPermission -Identity "user1" -User "user2" -AccessRights FullAccess -InheritanceType All
Remove Full access mailbox permission
Remove-MailboxPermission -Identity "user1" -User "user2" -AccessRights FullAccess -InheritanceType All
Get Last login:
Get-MailboxStatistics "user1"
Get Mailbox size:
Get-MailboxStatistics "user1" | ft DisplayName, TotalItemSize, ItemCount
Get All Mailbox
Get-Mailbox | Select-Object DisplayName, primarySMTPAddress
Get one mailbox
Get-Mailbox "user1" | Select-Object DisplayName, primarySMTPAddress
Display the list of a SMTP aliases and the primary address
Get-Mailbox "user1" | fl EmailAddresses, PrimarySmtpAddresses
Add Permission Calendar access mailbox
Add-MailboxFolderPermission -Identity "user1:\Calendar" -User "user2" -AccessRights Reviewer
Add permission Calendar access Default to Reviewer
Set-MailboxFolderPermission -Identity "user1:\Calendar" -User Default -AccessRights Reviewer
Set permission Calendar access Default (back)
Set-MailboxFolderPermission -Identity "user1:\Calendar" -User Default -AccessRights AvailabilityOnly
View permission calendar who access mailbox
Get-MailboxFolderPermission -Identity "user1:\Calendar"
foreach($i in Get-Mailbox -ResultSize 100 -Filter 'DisplayName -like "*ห้องประชุม*"') {Get-MailboxFolderPermission $($i.Alias + ":\Calendar")| Select-Object Identity,User,AccessRights | Sort-Object Identity}
* -ResultSize Unlimited
Delete user access pemission calendar
Remove-MailboxFolderPermission -Identity "user1:\Calendar" -User "user2"
View number of account license
Get-MsolAccountSku
Get all assigned License office O365
Get-MsolUser -All | Where-Object { ($_.licenses).AccountSkuId -match "nanyangtextilegroup:STANDARDPACK" } | Select-Object DisplayName,UserPrincipalName,Licenses,Department,Title,Country,State,WhenCreated | Export-Csv C:\Users\hades\Documents\allmaillicense2-1.csv
Get-MsolUser -MaxResults 10 | Where-Object { ($_.licenses).AccountSkuId -match "nanyangtextilegroup:STANDARDPACK" } | Select-Object DisplayName,UserPrincipalName,Licenses,Department,Title,Country,State,WhenCreated | Format-Table
Get-MsolUser -All | Where-Object { $_.isLicensed -eq "E1" } | Select-Object DisplayName,UserPrincipalName,Licenses,Department,Title,Country,State,WhenCreated | Export-Csv C:\Users\hades\Documents\allmaillicense2-1.csv
Get all Unlicense office O365
Get-MsolUser -UnlicensedUsersOnly | Select-Object DisplayName,UserPrincipalName,Licenses,Department,Title,Country,State | Export-Csv C:\Users\hades\Documents\unlicense.csv
Get all email user on Department "QA"
Get-MsolUser -MaxResults 1000 | where {$_.Department -eq "QA"} | Select-Object DisplayName,UserPrincipalName,Licenses,Department,Title,Country,State | Format-Table
Get all email user by Contry "Vietnam"
Get-MsolUser -MaxResults 1000 | where {$_.Country -eq "Vietnam"} | Select-Object DisplayName,UserPrincipalName,Licenses,Department,Title,Country,State | Format-Table
Get view detail email
Get-MsolUser -All | where {$_.DisplayName -eq "ABC DEFC"} | Select-Object DisplayName,UserPrincipalName,Department,Title,Country,State,WhenCreated | Format-Table
Display a list of users who haven’t changed their passwords for more than 90 days:
Get-MsolUser -MaxResults 20 | Where-Object { $_.LastPasswordChangeTimestamp -lt (Get-Date).AddDays(-90)} | Select-Object DisplayName,UserPrincipalName,LastPasswordChangeTimestamp,Licenses,PasswordNeverExpires | Format-Table
Change new password email with Powershell
Set-MsolUserPassword -UserPrincipalName user1@onmicrosoft.com -NewPassword P@SSw0rd!
Rebuild Index email O365
New-MoveRequest -Identity user1@domain.com
Check status rebuild Index
Get-MoveRequest -Identity user1@domain.com
Get mail Inbox Forwarding
Get-Mailbox -ResultSize 2000 | select UserPrincipalName,ForwardingSmtpAddress,DeliverToMailboxAndForward | Export-csv Office365Forwards.csv -NoTypeInformation
Get email Forwarding
Get-Mailbox email@domain.com | FL DeliverToMailboxAndForward,ForwardingAddress,ForwardingSmtpAddress
Create new external contact
New-MailContact -Name "My-gmail" -ExternalEmailAddress email@gmail.com
Display user not set Archive
Get-Mailbox -Filter {ArchiveStatus -Eq "None" -AND RecipientTypeDetails -eq "UserMailbox"}
Check for Archive status for some user
Get-mailbox usermail|fl ArchiveStatus
Get-Mailbox usermail |fl ArchiveStatus,Archivedatabase,Archiveguid
Enable Archive all
Get-Mailbox -Filter {ArchiveStatus -Eq "None" -AND RecipientTypeDetails -eq "UserMailbox"} | Enable-Mailbox –Archive
Enable one person
Enable-Mailbox -Identity "user mail” -Archive
Example : Enable-Mailbox -Identity "akom.b” -Archive
Search and Delete mail by Subject
| 1. Search-Mailbox -Identity "email@domain.com" -SearchQuery 'Subject:"subject send mail"' -DeleteContent |
Copy all email from one to another mail
example: Search-Mailbox "email.a" -TargetMailbox "email.c" -TargetFolder "Email User" -LogLevel Full
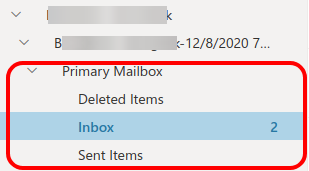
Check archive In-place size


get-msoluser
office-365-powershell-commands
how-to-install-microsoft-powershell-on-ubuntu
forward email
search and delete mail
copy mailbox